Optitex: zero-waste boy’s jacket
Gallery and process brief for a little boy’s zero-waste jacket, which was one of the garments completed in my zero-waste garment research and innovative solutions study.
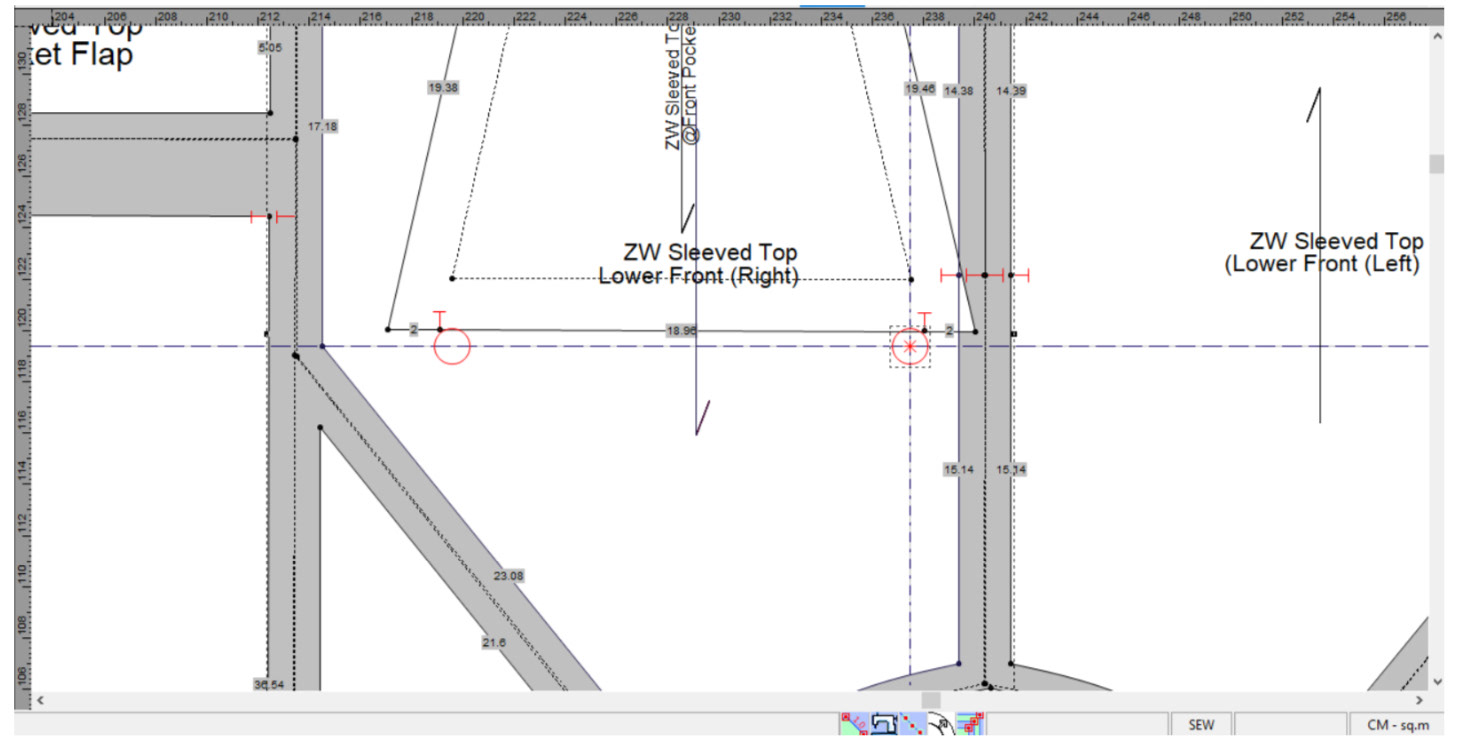
Optitex Pattern development
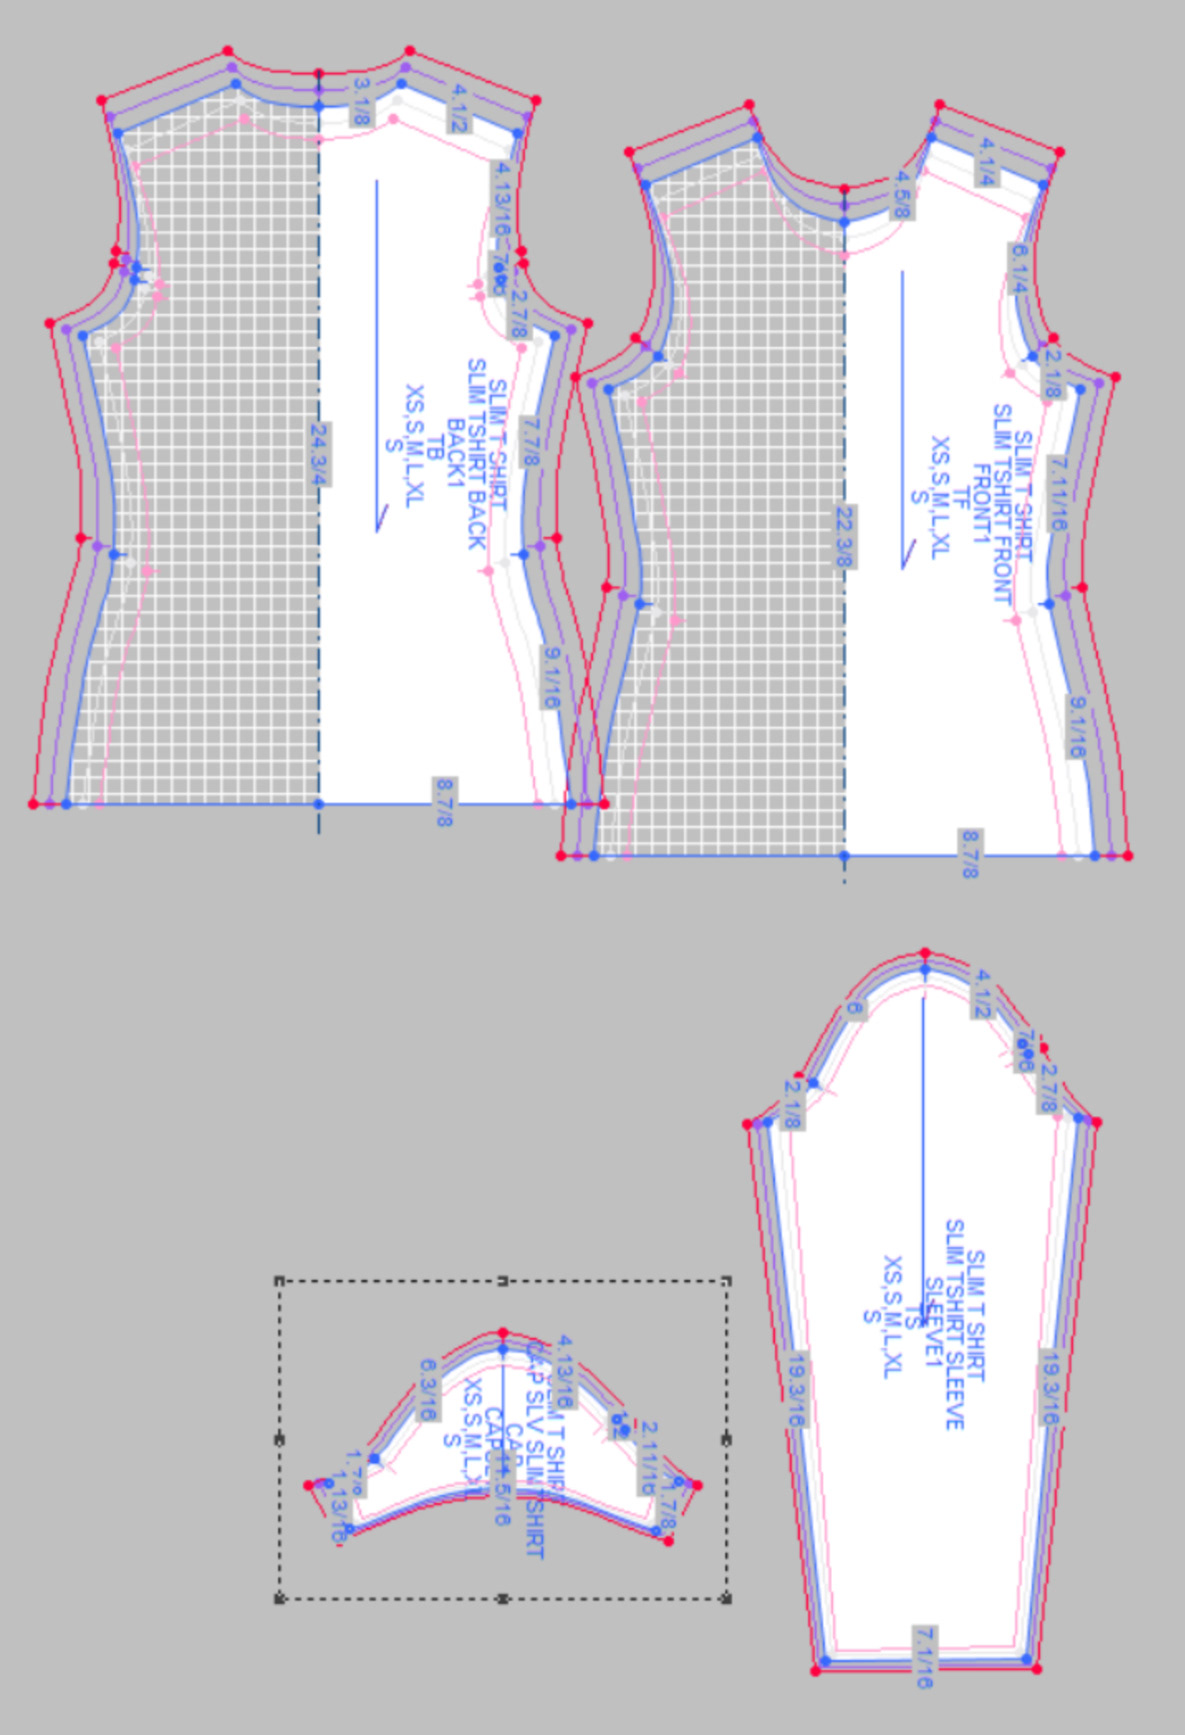
To begin my drafting, i started off with one the most basic blocks available to me, which was a
women’s T-shirt block. Before starting, I had come across some Japanese childrenswear brands in my research for
another project and kept seeing these really boxy, cropped jackets for little boys which inspired me to try designing
something a bit less fitted. I also realized that angles and straight edges were significantly easier to fit
together and I developed a sleeve design that had minimal curved edges, could be pieced together easily and had
An identical front and back bodice and sleeve (apart from the CF and CB areas). To make sure this sleeve fit
properly and didn’t flare out at the shoulder or pucker under the armpit, I slashed a triangle within the front and
back bodice and angled the sleeve within it, until the shoulder seam and the sleeve lined up and made a straight
line. I then made sure to lightly curve the underarm on both the sleeve and the bodice pieces, which helped prevent
puckering and ensured proper fit.

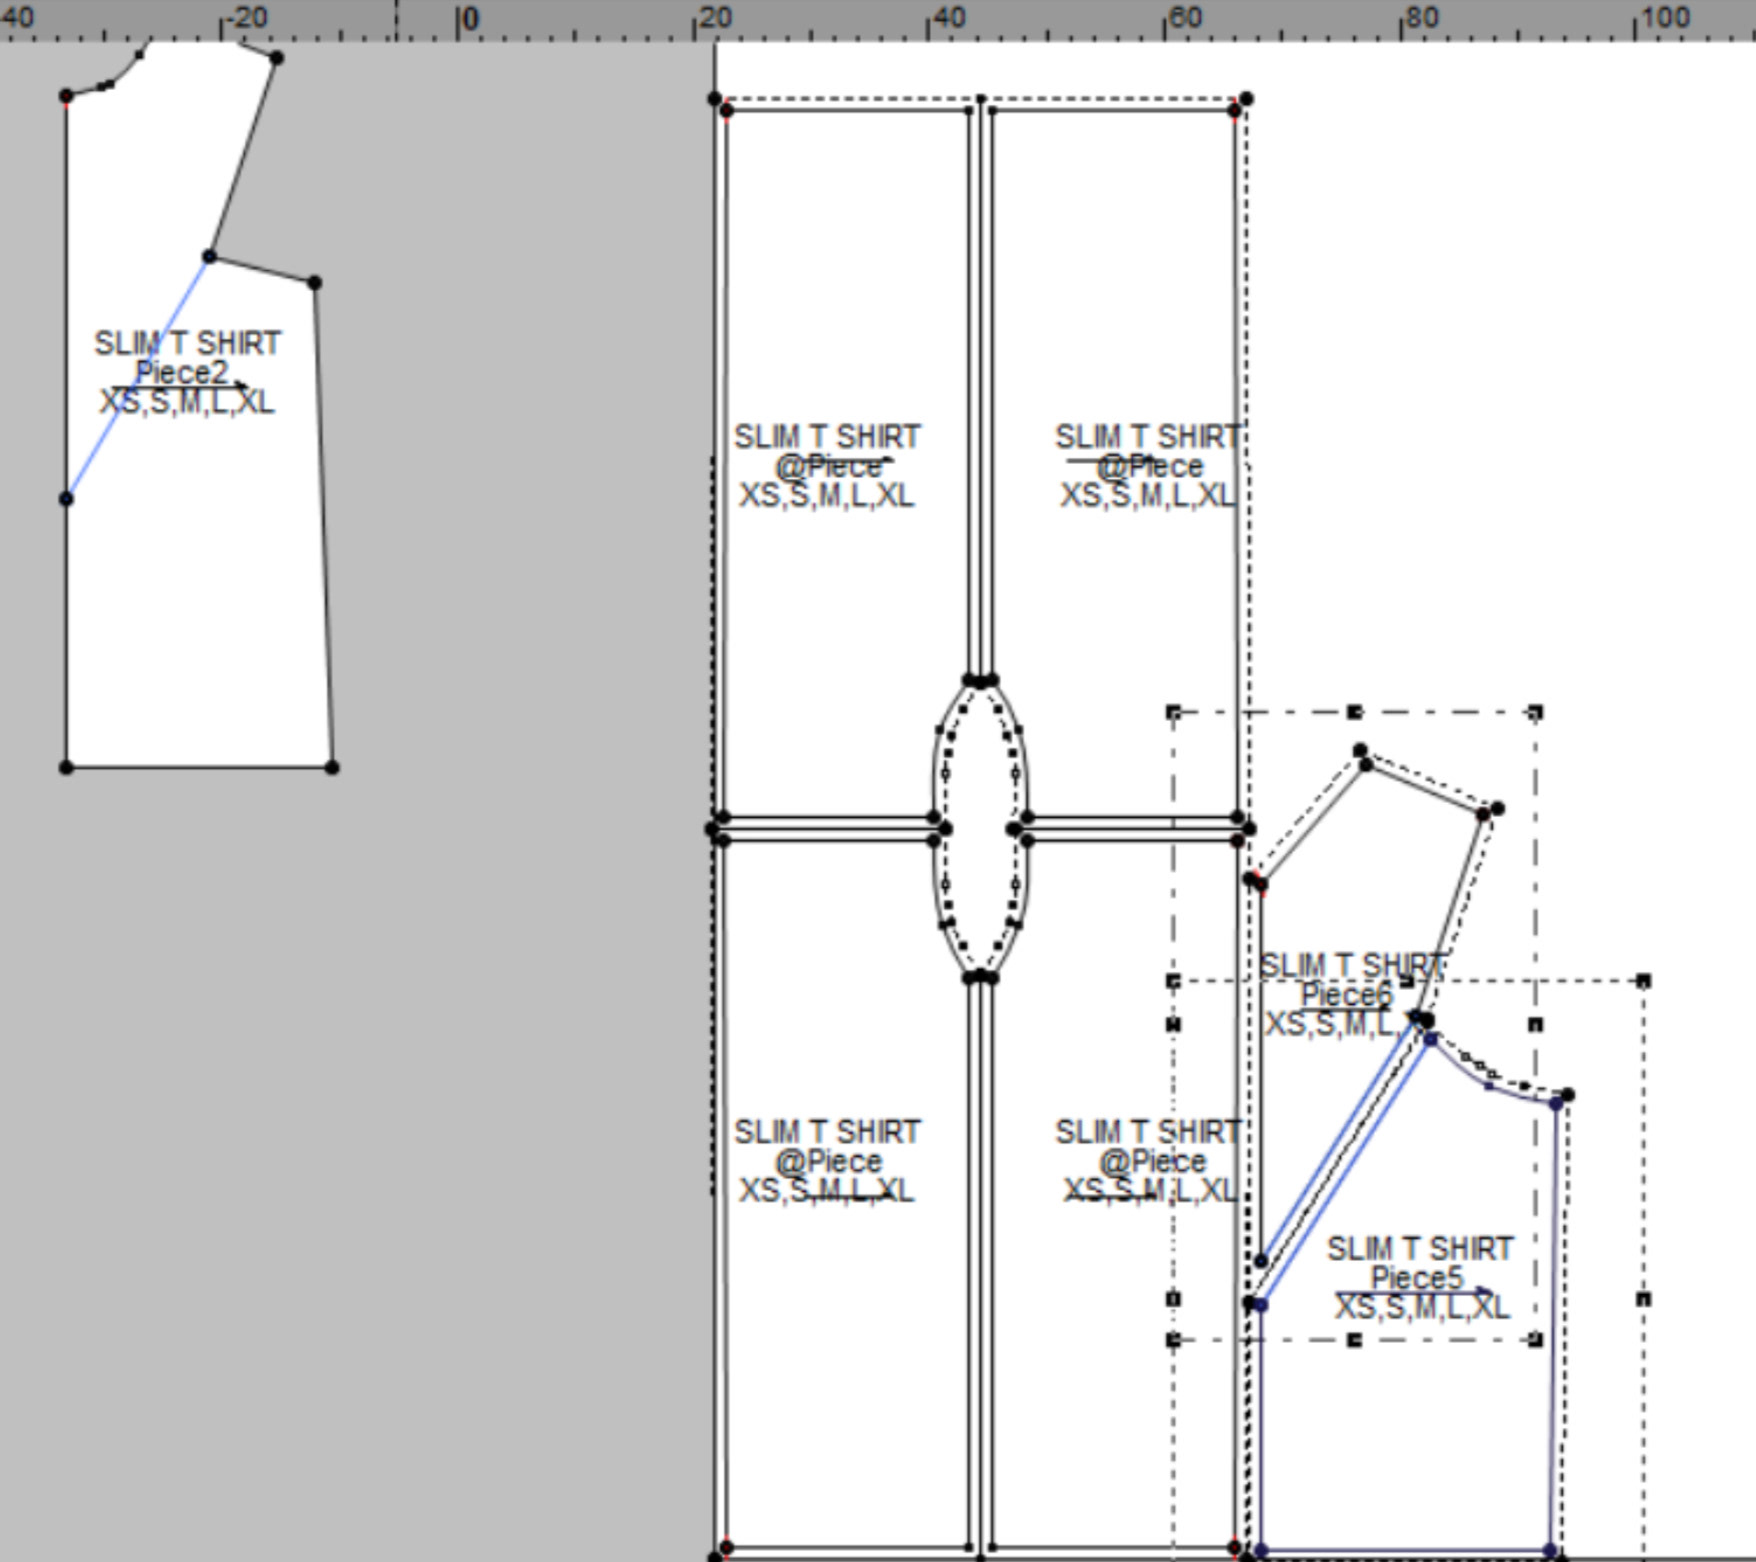
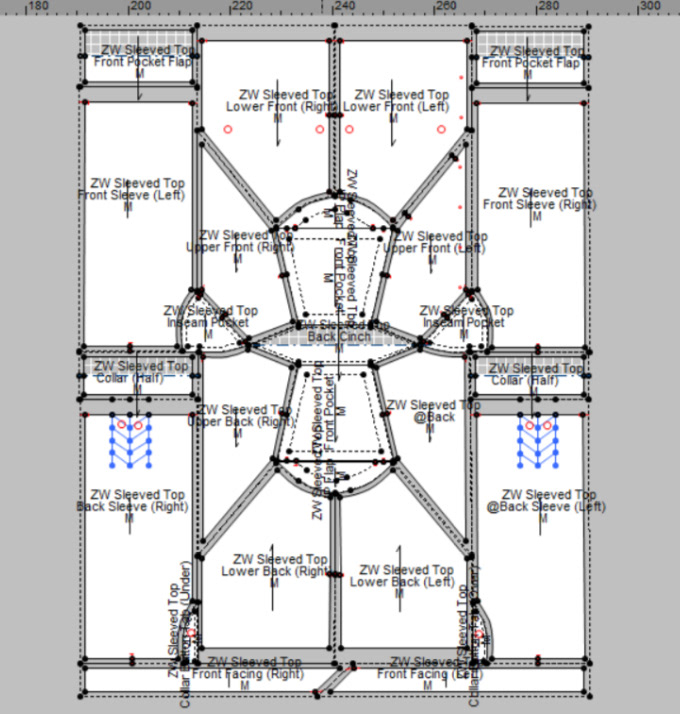
As I was progressing with the pattern, it was crucial that I accounted for the seam allowance on each piece,
which in general was 1cm. This felt appropriate as I was producing a full-sized pattern. Some of the pockets and
the pocket flaps I drafted in between the bodice and sleeve pieces ended up being disproportionately big for their
respective areas on the bodice, so I ended up making the seam allowance a bit bigger on these pieces so they’d fit.
Contrasting some of the patterns I had seen prior to this in my research, I actually found that I could understand
a severely symmetrical pattern a lot better than anything asymmetrical, hence why my final pattern is
symmetrical in halves and somewhat in radial quarters. By following symmetry, I felt like I could see where pattern
pieces walked off and where they didn’t and where some may not be proportional to the rest. I also noticed that I
could easily make sure that my pieces possessed a proper pair, and that they could be cut out and sewn
with the right side of the fabric facing out, not in.
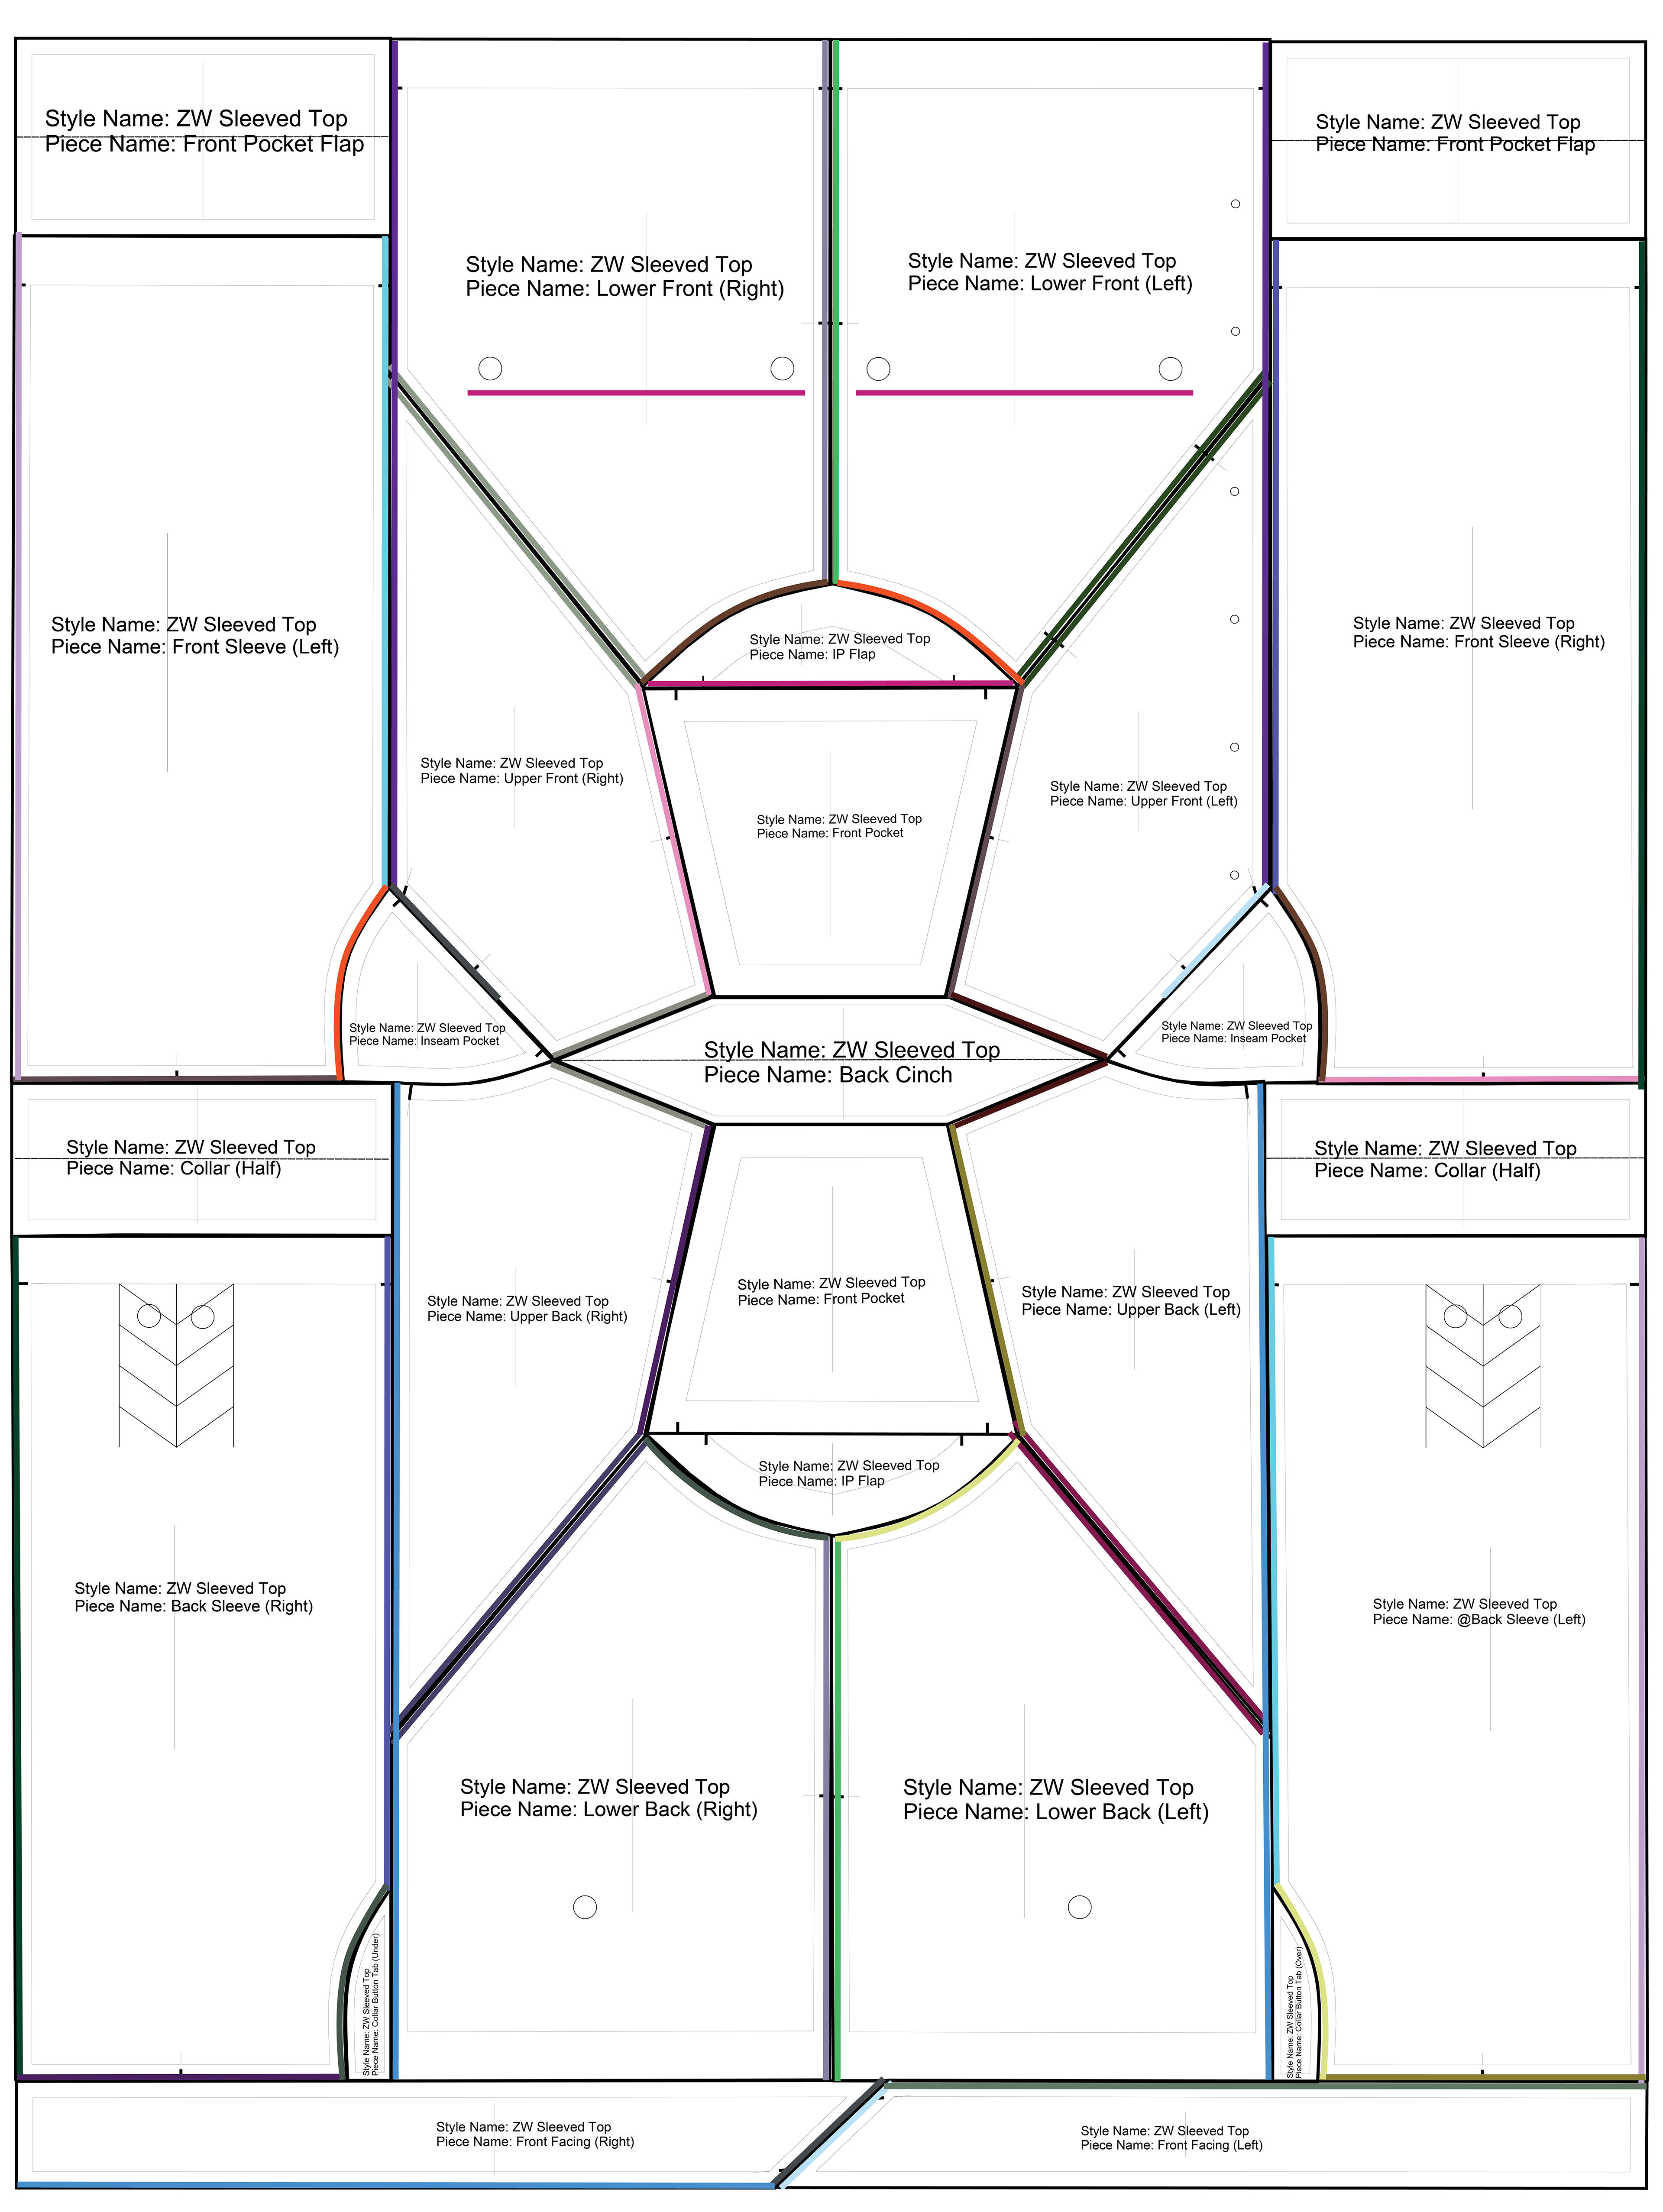
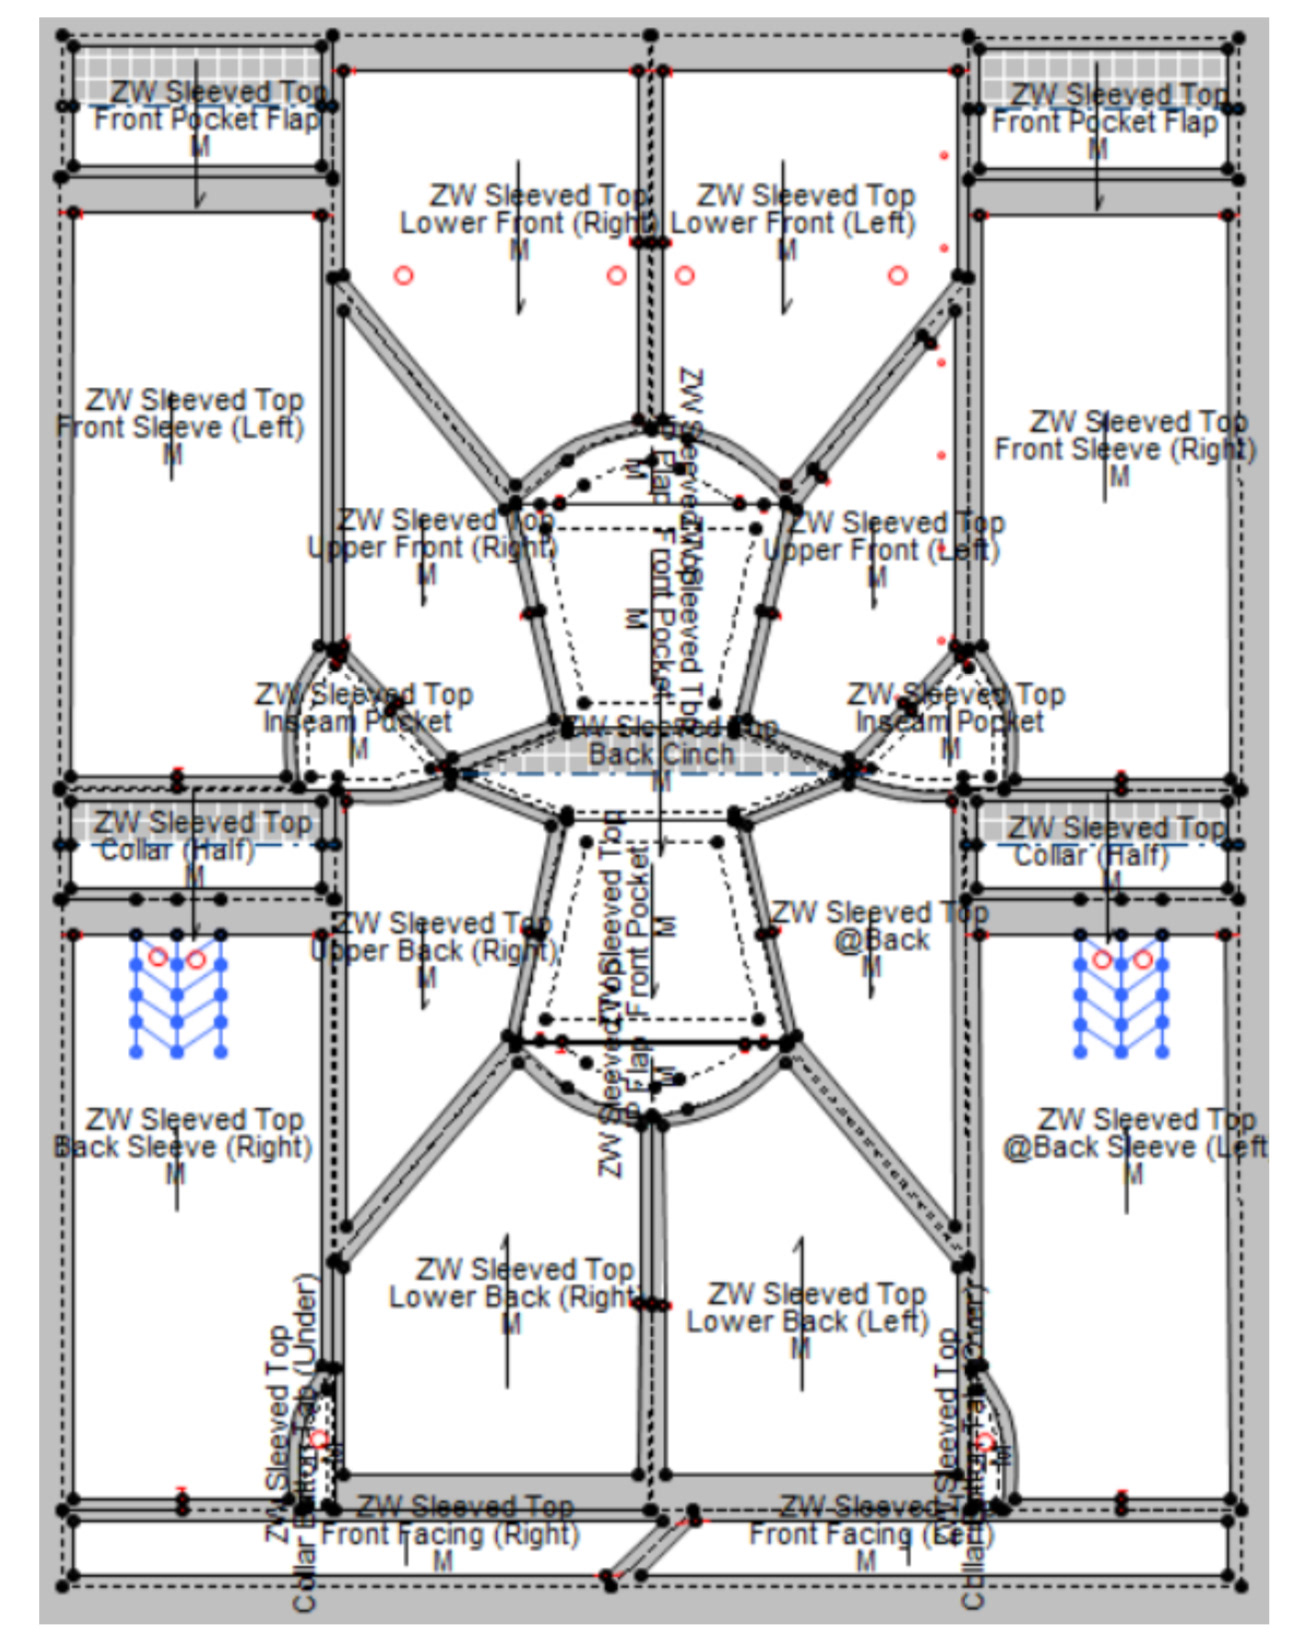
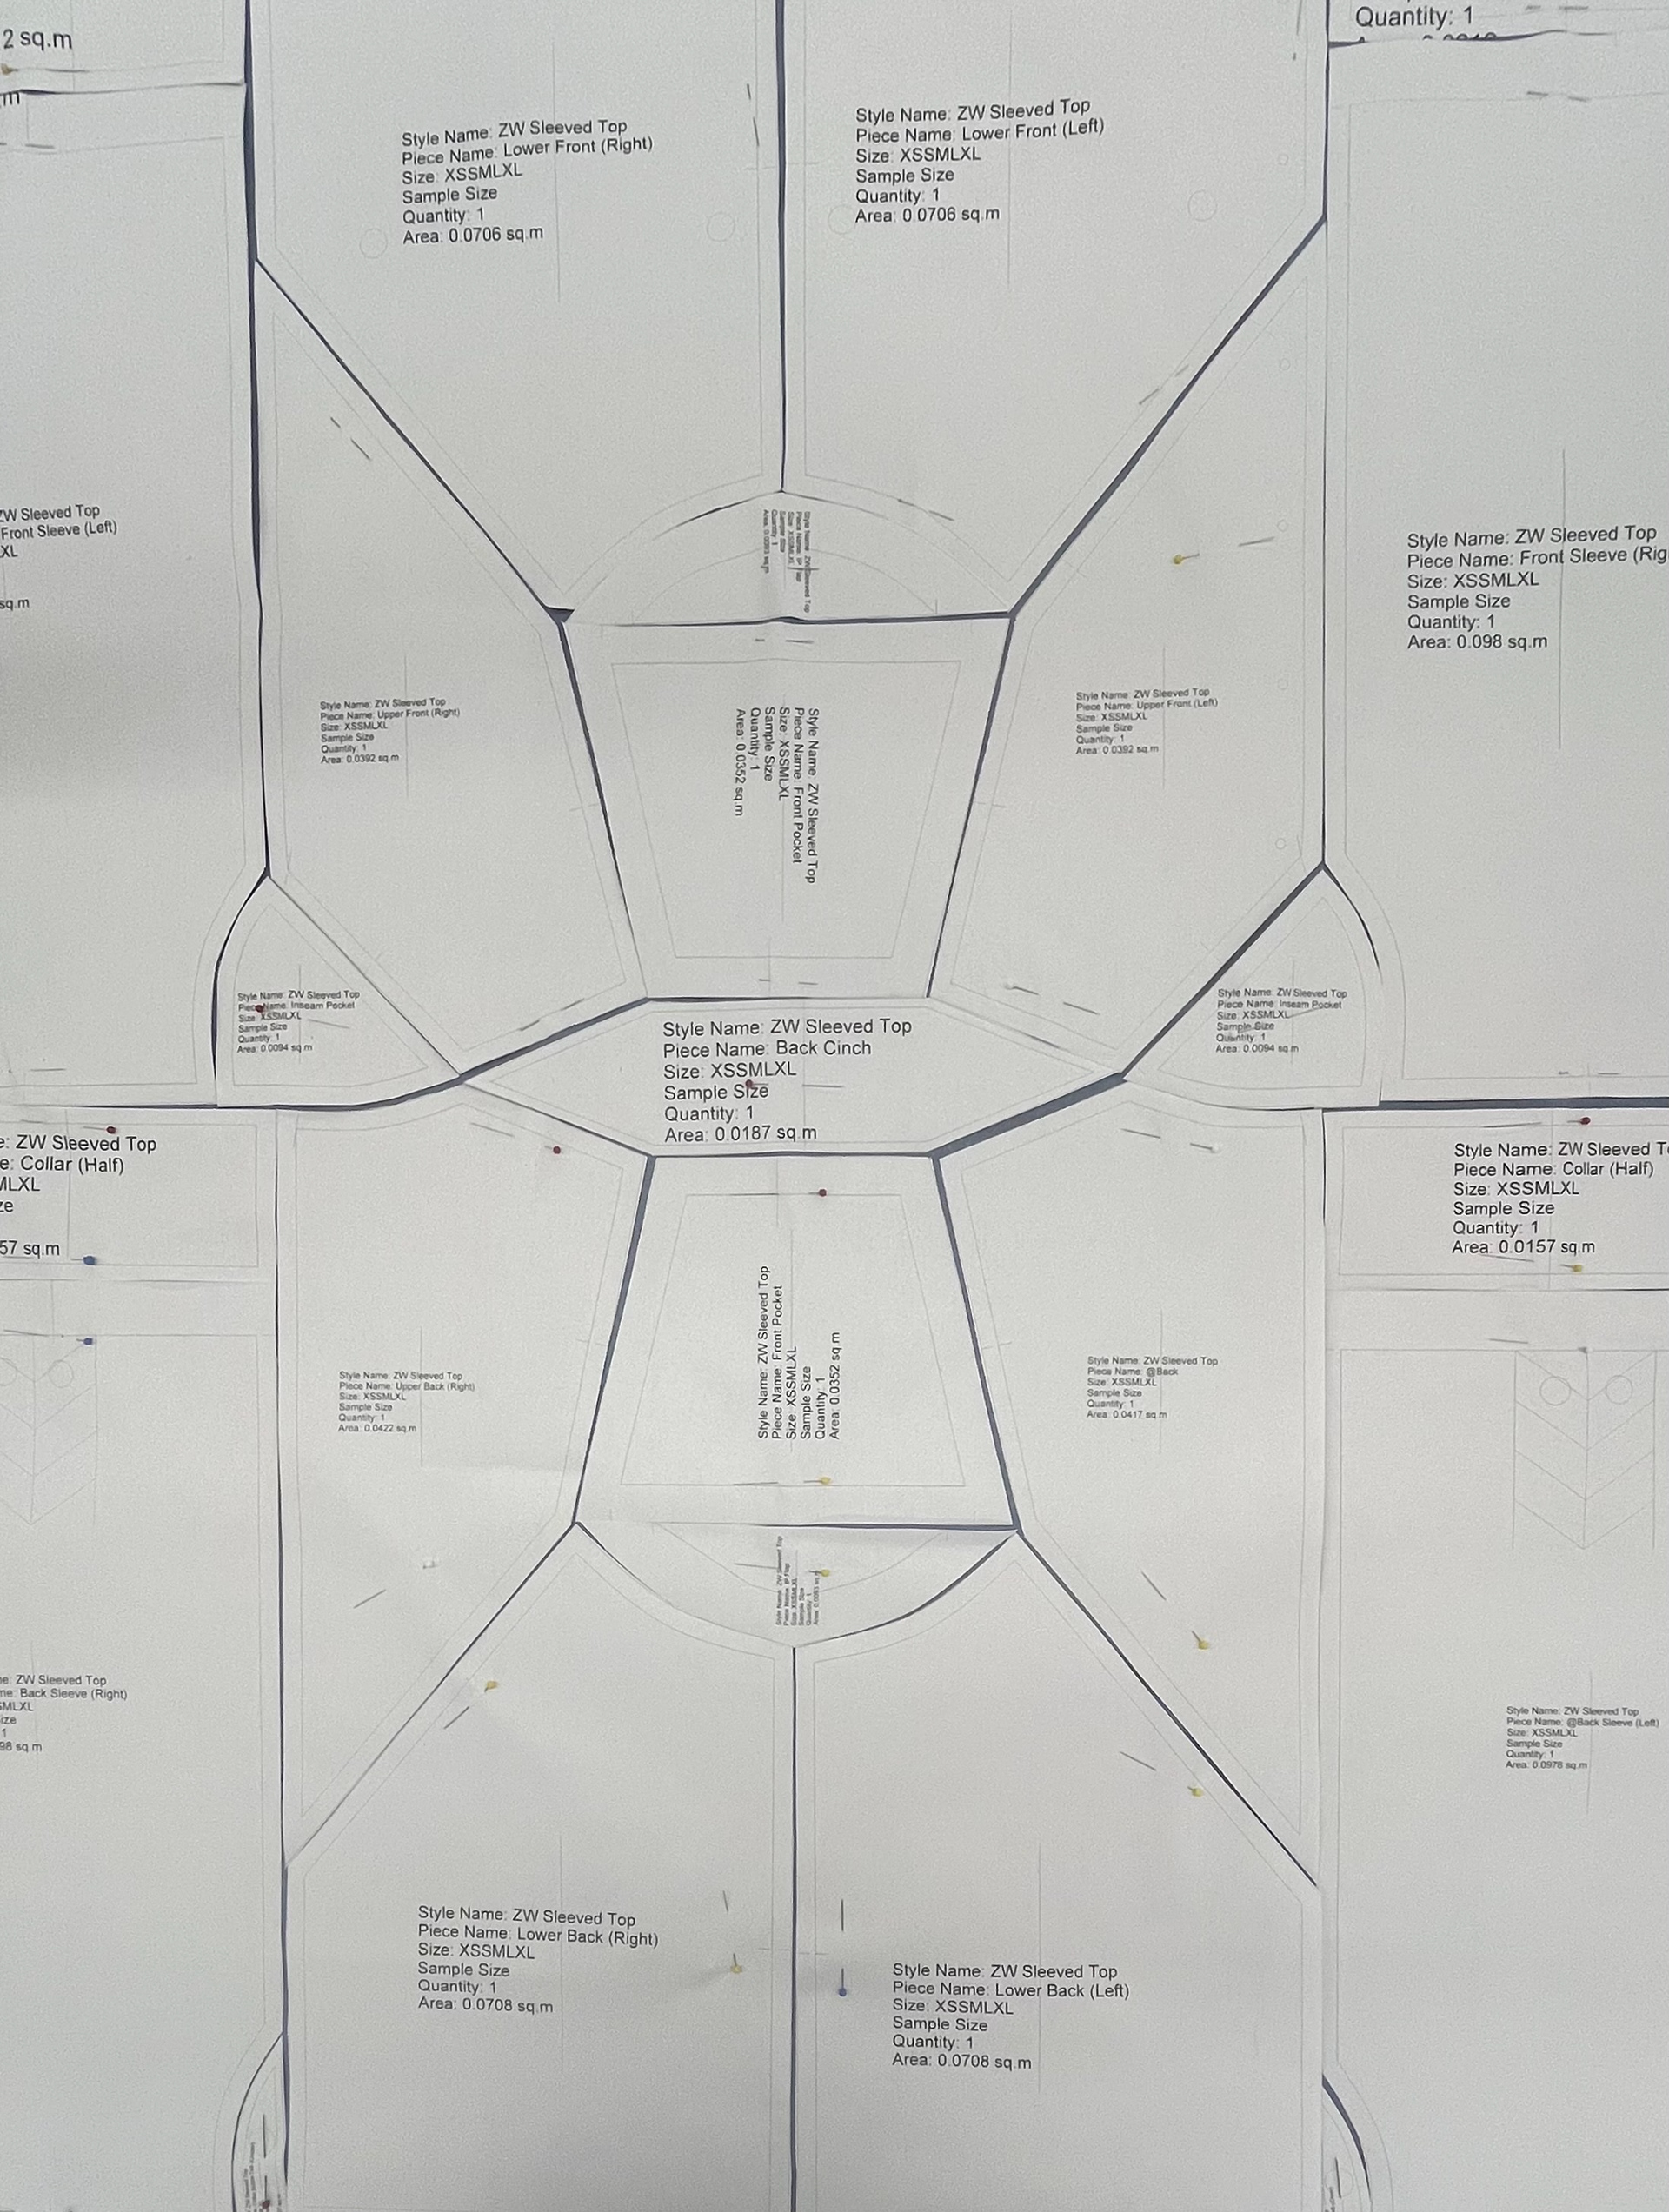
Final pattern: final pattern in optitex and plotted
the final pattern was a large 131.6cm x 99cm rectangle, which was plotted on a slightly larger roll of paper and then cut out. The goal at this stage was to ensure that all pieces were matching and that any gaps in the pattern where there would be fabric waste was resolved prior to plotting.
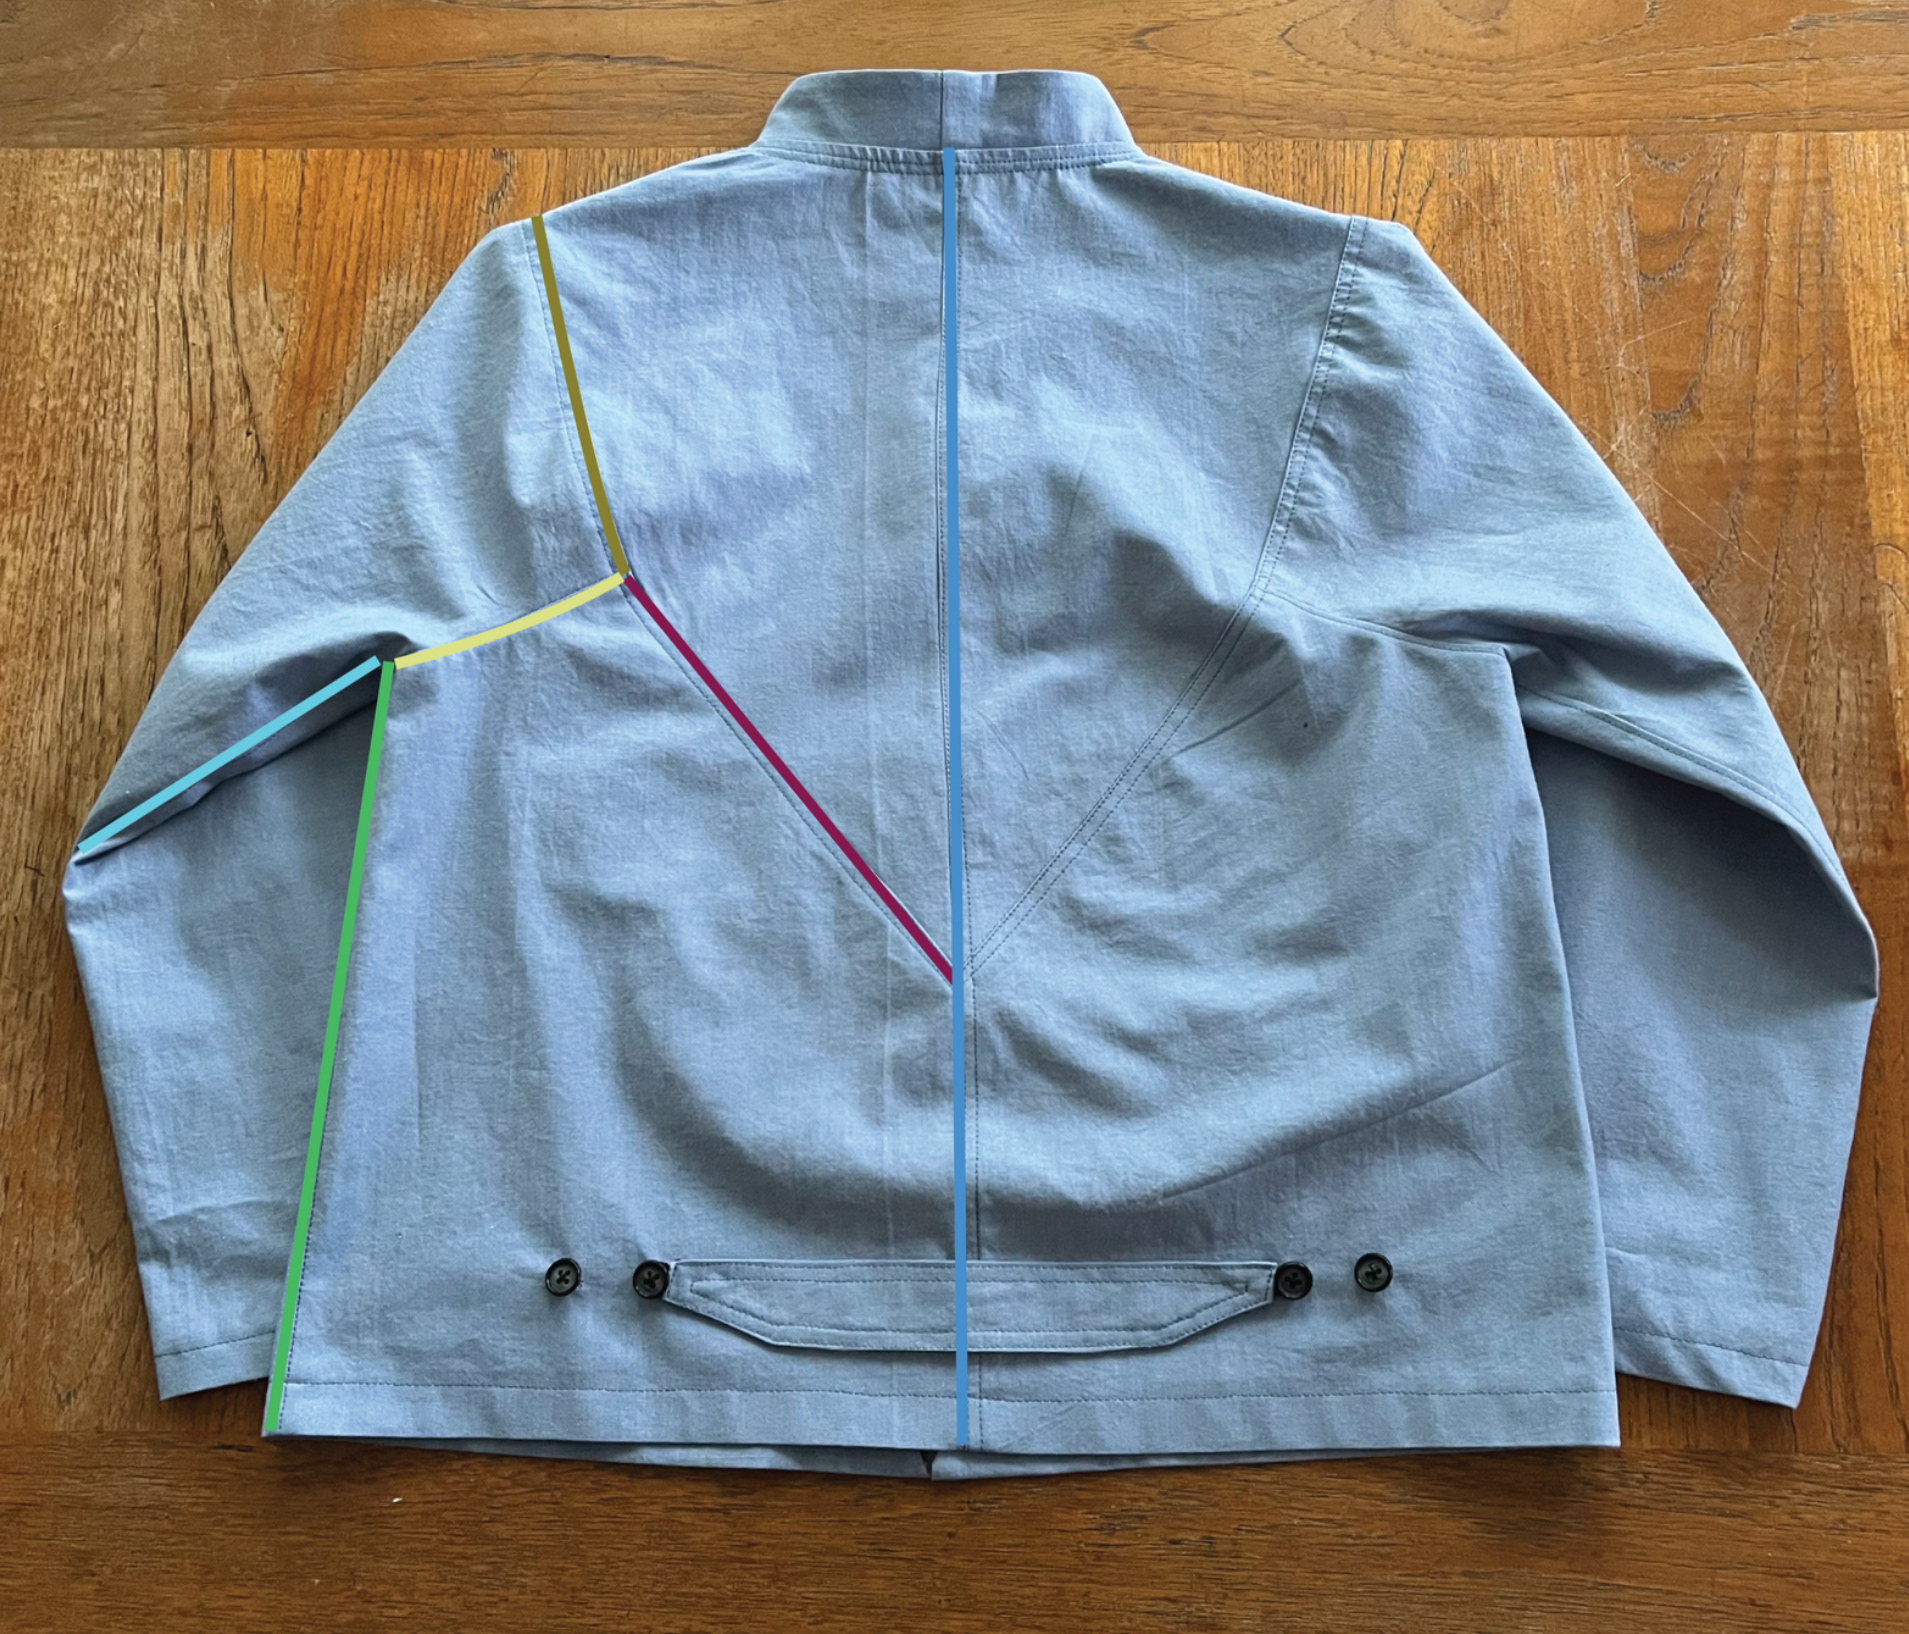
Final Garment laid flat: front and back view
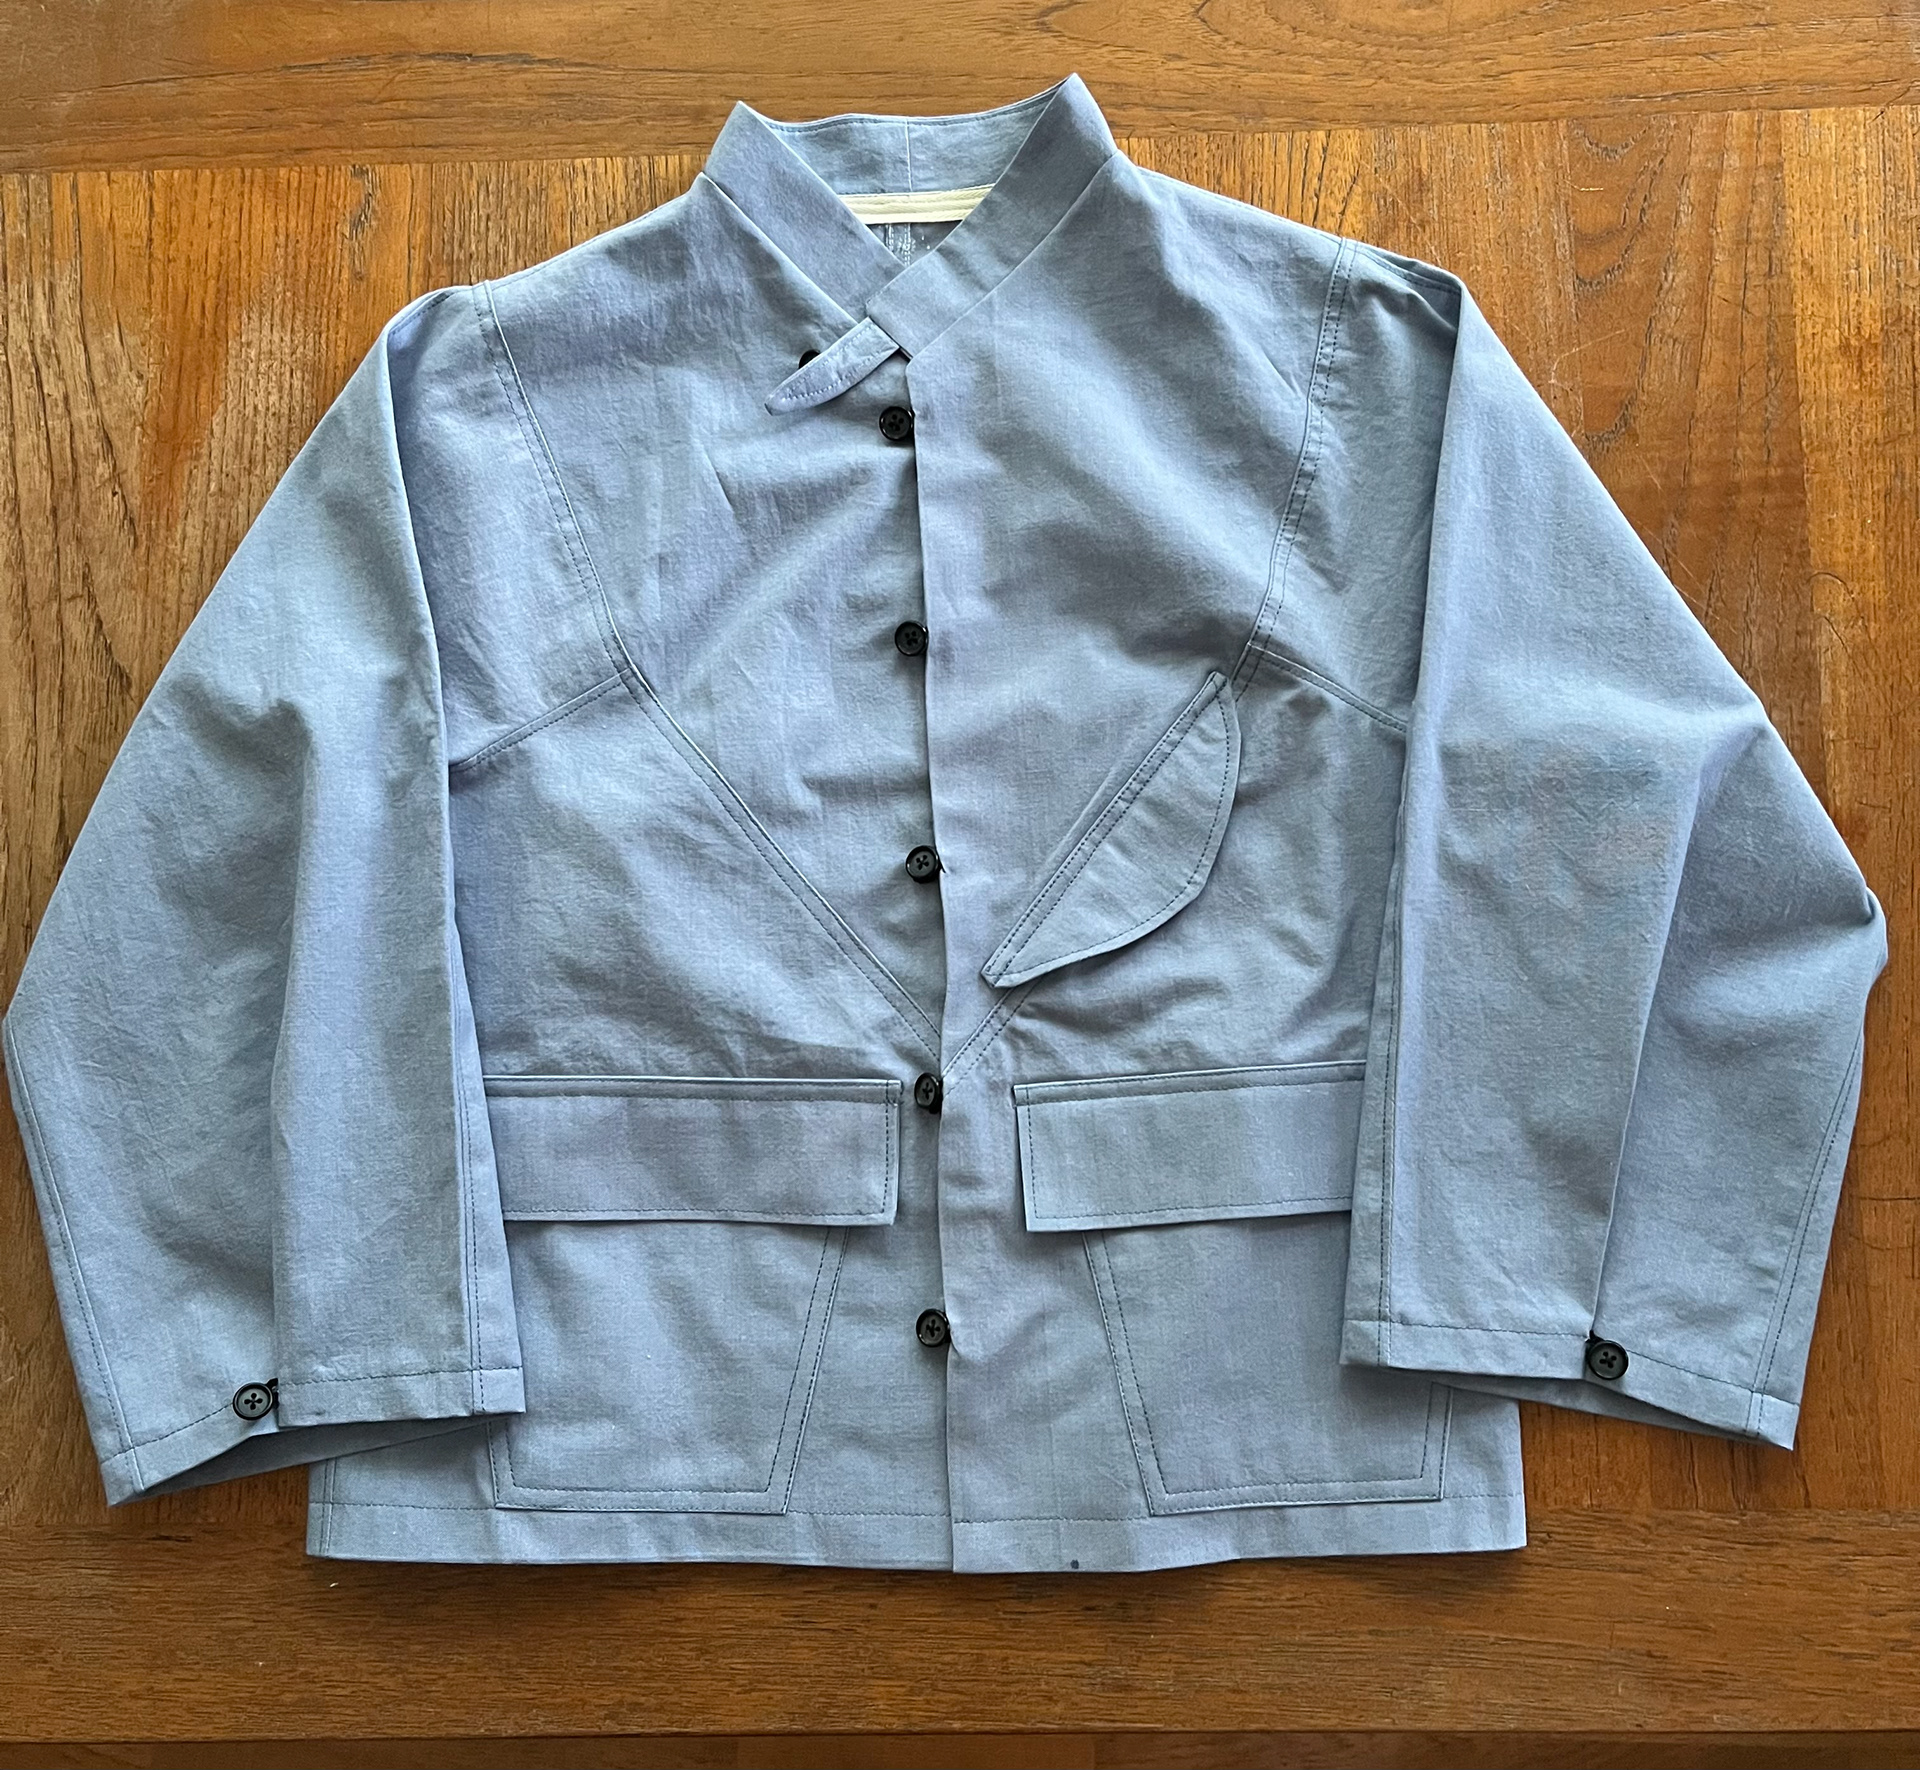
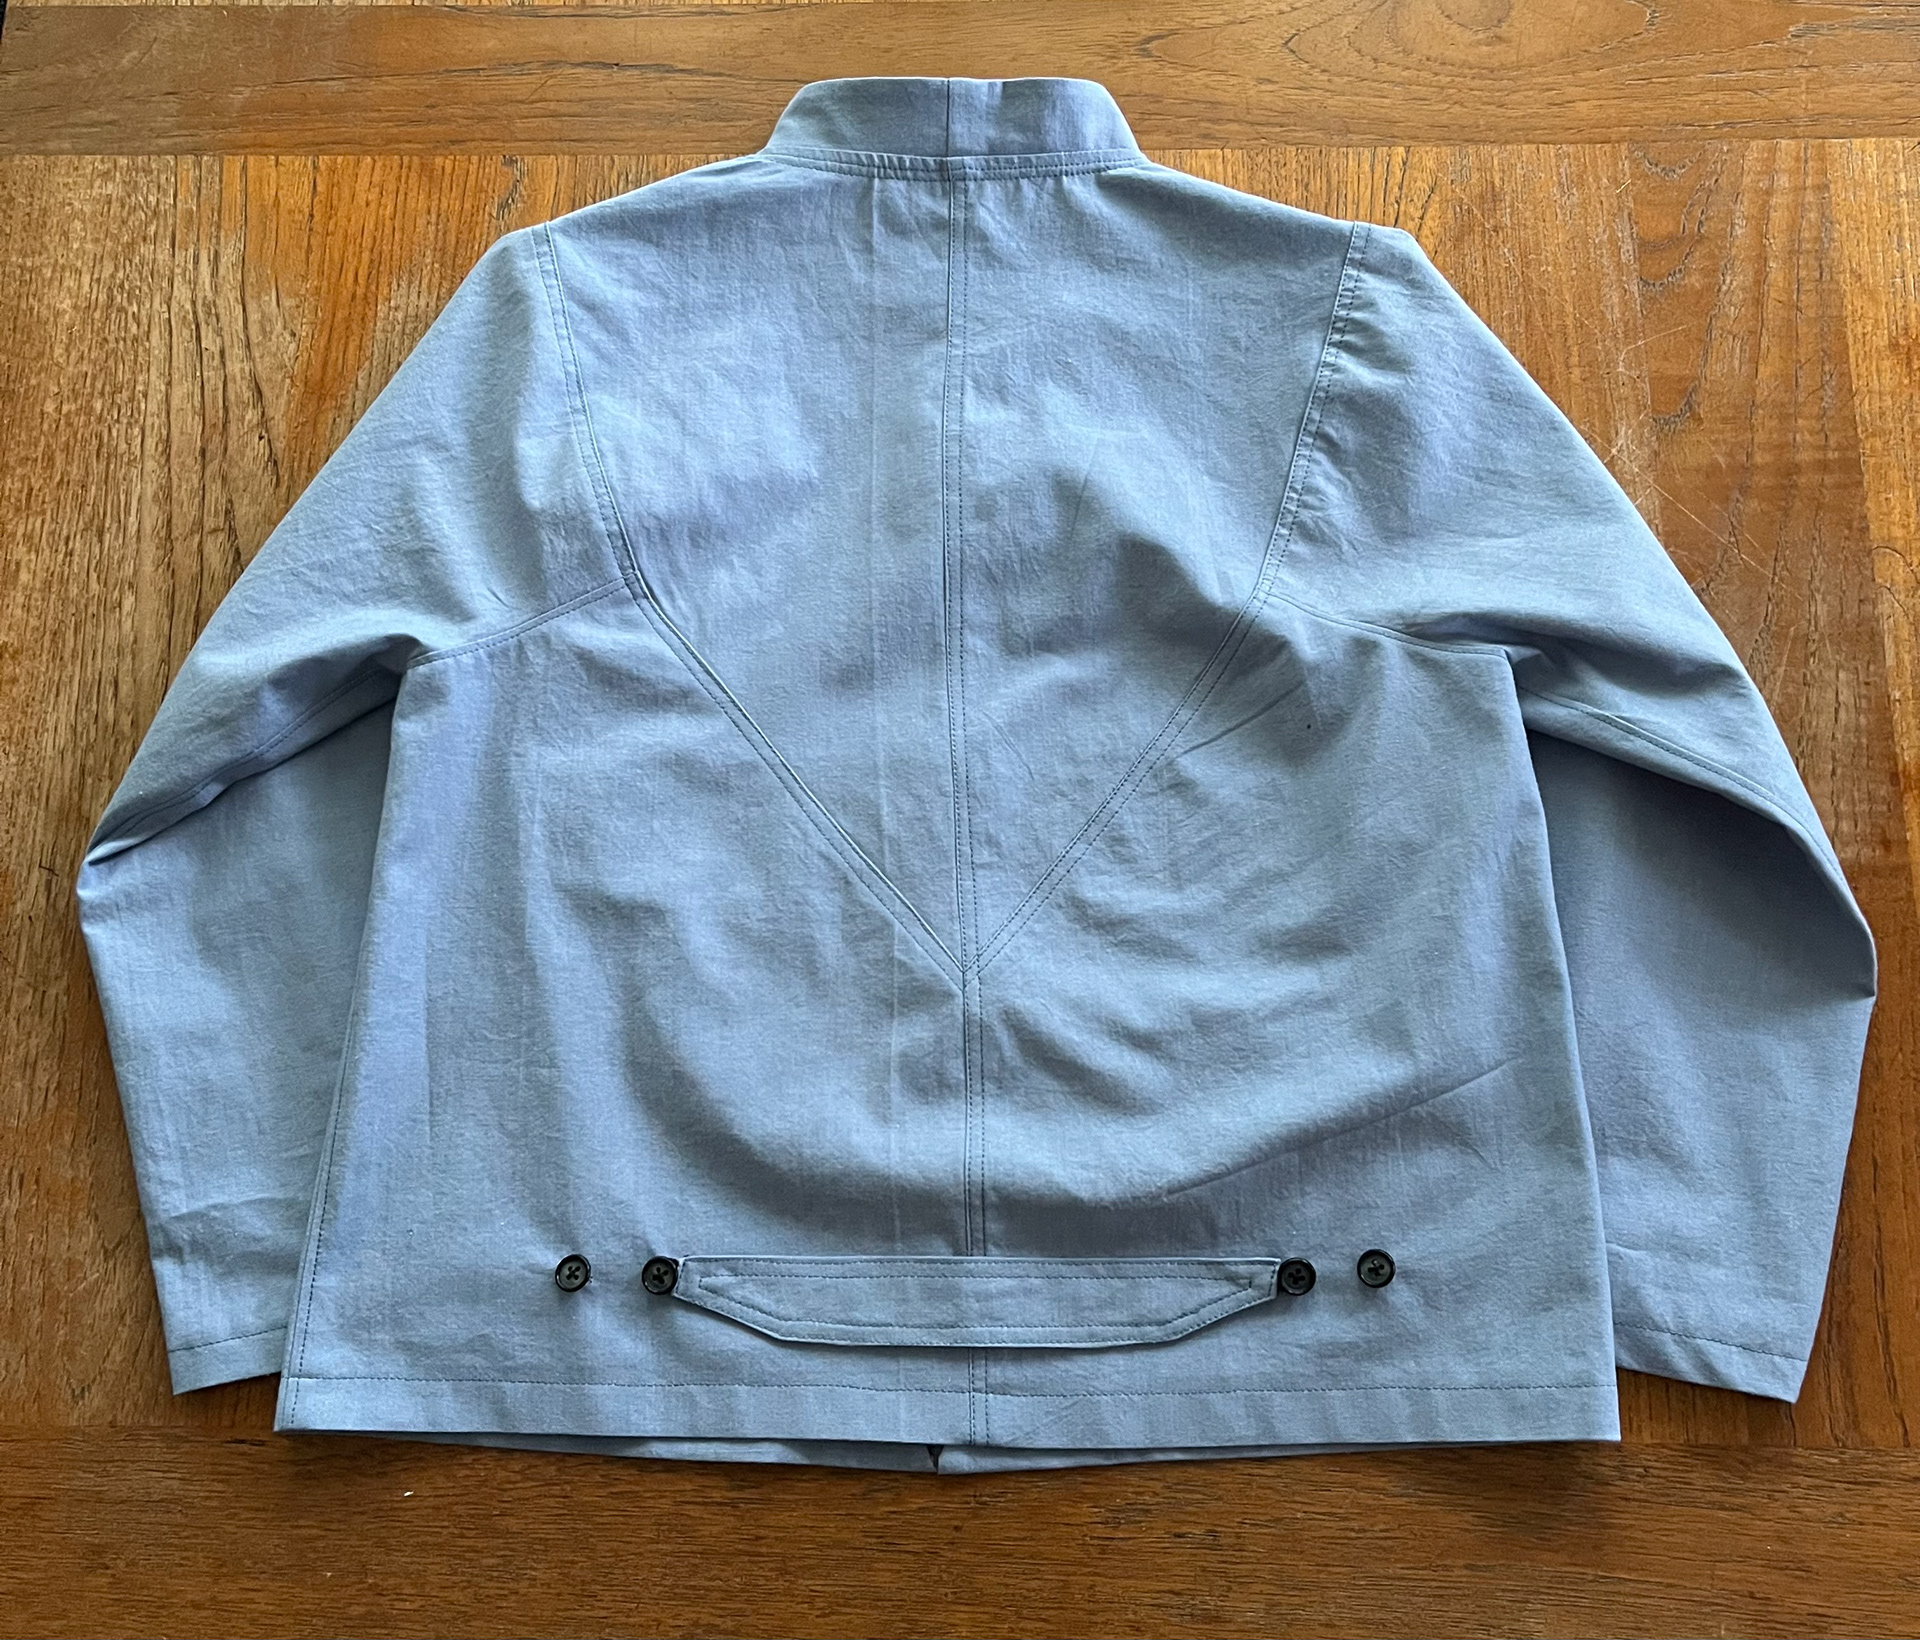
final garment with final coloured pattern
pattern a large part of innovative, zero-waste design is communication, and how a relatively inaccessible pattern can be understood in production. Utilizing coloured lines that match each seam to one another may not be standard practice in general spec-ing, but is effective and necessary for patterns that are difficult to interpret.